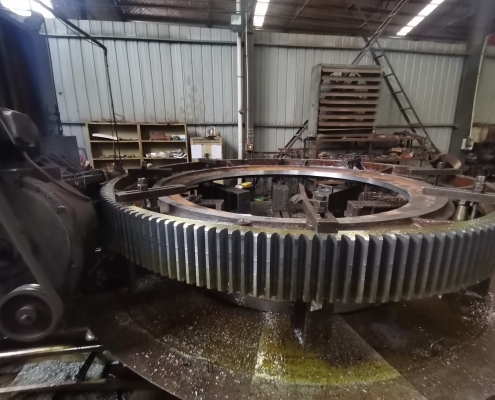
Maintenance and care instructions for shafts

I. Introduction
This article aims to provide guidance on the use, maintenance and care of shafts, hoping to provide effective help to users.

II. Introduction to shafts
A shaft is a rotating component used to transmit power or carry loads. The types and uses of shafts are very wide, such as automobile engine shafts, ship transmission shafts, electromechanical equipment shafts, etc.

III. Precautions for use
1. Before using the shaft, you must carefully read the instruction manual and correctly install and adjust the shaft according to the contents of the manual.
2. Avoid excessive load use, and choose and use the shaft reasonably according to working conditions.
3. Check regularly to ensure the cleanliness and lubrication of the shaft end, and avoid the influence of dust and wear on the shaft.
4. Avoid long-term operation of the shaft, give the shaft appropriate downtime to fully cool it, and reduce friction and wear during use.
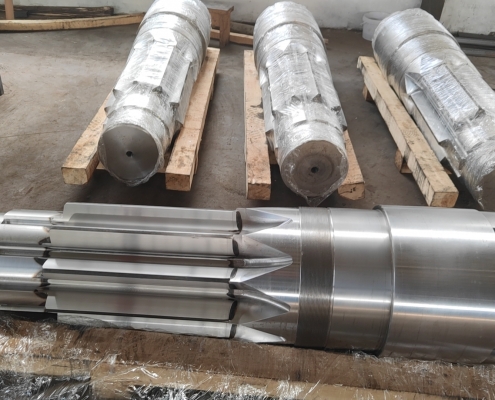

IV. Maintenance
1. Cleaning the shaft
When maintaining the shaft, first remove the dirt, grease and dust on the shaft. You can use detergent and a soft brush to clean it, but be careful not to use acidic and alkaline solutions to avoid corrosion of the shaft surface and aggravated wear.
2. Lubricating the shaft
Lubrication of the shaft is one of the keys to ensure its normal operation. In order to ensure the lubrication effect and service life of the shaft, it is necessary to apply appropriate lubricating oil to the shaft. The type of lubricating oil should be selected according to the working conditions of the shaft, and it should be replaced and refueled regularly to maintain a good oil film and avoid shaft damage due to insufficient lubrication or poor quality.
3. Regular inspection
Regular inspection of the shaft is an important means to ensure its normal operation and extend its service life. When conducting the inspection, pay attention to the following points:
(1) Check whether the shaft is firmly installed with other components, and whether there is any looseness or deformation.
(2) Check whether the shaft rotates smoothly and whether there is any abnormal sound or vibration.
(3) Check whether the surface condition of the shaft is flat and smooth, and whether there are any cracks, wear, corrosion, etc.
(4) Check whether the lubrication of the axle is good. If there is insufficient lubrication or lubricant corruption, add lubricant in time.

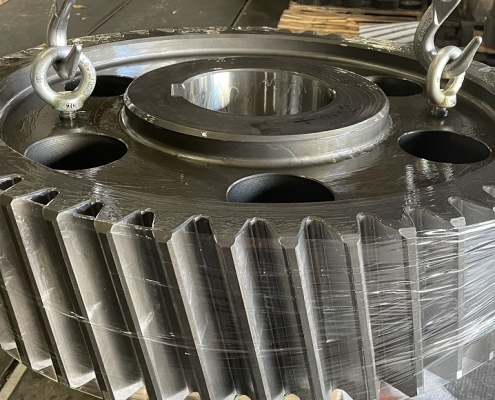
About gear transmission types and fault response methods

When manufacturing gears, several typical errors such as eccentricity, pitch error, base pitch error and tooth profile error are usually generated. There are many reasons for gear manufacturers to generate these errors, including errors from machine tool movement, cutting tool errors, errors from improper installation and debugging of tools, workpieces, and machine tool systems, fixture errors, and gear deformation caused by internal stress during heat treatment. When these gear errors are large, it will cause the gear transmission to rotate slowly and quickly with micro-inertia interference, causing impact and vibration when the gear pair is meshed, causing large noise.
Due to assembly technology and assembly methods, the assembly error of “one end in contact and one end hanging” is usually caused when assembling gears; linear deviation of gear shaft and imbalance of gears, etc. One-end contact or linear deviation of gear shaft will cause uneven load on the gear, causing excessive load on individual gear teeth and local early wear, and even cause gear tooth breakage in severe cases. Gear imbalance will cause impact vibration and noise.

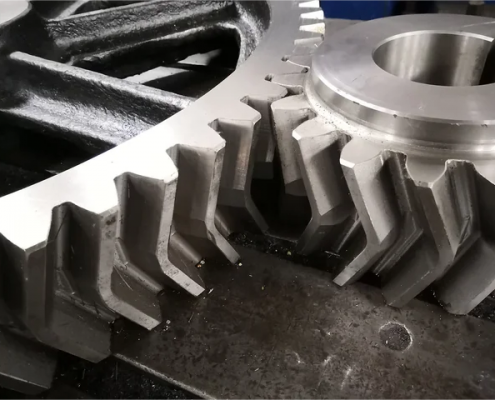
1. Tooth fracture
During gear transmission, the action force of the driving gear and the reaction force of the driven gear both act on the other gear teeth through the contact point. The dangerous situation is that the contact point is located at the top of the gear teeth at a certain moment; at this time, the gear teeth are like a cantilever beam. The bending stress generated at the root of the gear teeth after being loaded is large. If it is suddenly overloaded or impact overloaded, it is easy to cause overload fracture at the root of the gear teeth.

2. Tooth surface wear or scratches
Gear teeth have relative sliding during meshing transmission, coupled with poor lubrication, unclean lubricating oil, lubricating oil deterioration, low speed heavy load or poor heat treatment quality, which can cause adhesive wear, abrasive wear, corrosive wear and scratches on the gear tooth surface.

3. Tooth surface fatigue
The so-called tooth surface fatigue mainly includes pitting and peeling of the tooth surface. The cause of pitting is mainly due to the micro fatigue cracks caused by the pulsating contact stress on the working surface of the gear teeth. When the lubricating oil enters the surface crack area, it first closes the entrance and then squeezes during the meshing process. The lubricating oil in the micro fatigue crack area expands the crack area on the gear tooth surface under high pressure, causing the surface metal particles to fall off from the tooth surface, leaving small pits to form pitting on the tooth surface. When the fatigue crack on the gear tooth surface continues to expand deeper and farther, it will cause a large area or large pieces to fall off, forming tooth surface spalling.

4. Plastic deformation of tooth surface
When the gear material is soft and the load transmitted is large, plastic deformation of the tooth surface is easy to occur. Under the action of excessive friction between the tooth surfaces, the contact stress of the tooth surface will exceed the material’s anti-extrusion yield limit, and the tooth surface material will enter a plastic state, causing plastic flow of the tooth surface metal. This causes the active gear to form grooves on the tooth surface near the pitch line, and the driven gear to form ridges on the tooth surface near the pitch line, thereby destroying the tooth shape.

What is the process flow of gear processing?

1. Forging and blanking
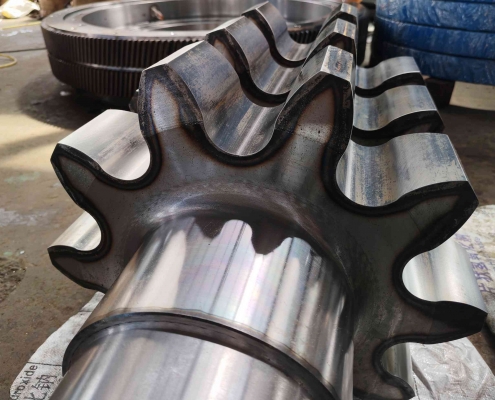
Hot die forging is still the most widely used blank forging process for automotive gear parts. In recent years, wedge cross rolling technology has been widely promoted in shaft processing. This technology is particularly suitable for blanking for relatively complex step shafts. It not only has high precision and small subsequent processing allowance, but also has high production efficiency.
2. Normalizing
The purpose of this process is to obtain a hardness suitable for subsequent gear cutting and to prepare the organization for the final heat treatment, so as to effectively reduce heat treatment deformation. The material of the gear steel used is usually 20CrMnTi. The general normalizing is greatly affected by personnel, equipment and environment, making it difficult to control the cooling speed and uniformity of the workpiece, resulting in large hardness dispersion and uneven metallographic structure, which directly affects metal cutting and final heat treatment, making thermal deformation large and irregular, and the quality of parts cannot be controlled. For this reason, the isothermal normalizing process is adopted. Practice has proved that the use of isothermal normalizing effectively changes the disadvantages of general normalizing, and the product quality is stable and reliable.


3. Turning
In order to meet the positioning requirements of high-precision gear processing, all gear blanks are processed using CNC lathes, and mechanical clamping is used without re-grinding the turning tool, so that the aperture, end face and outer diameter processing can be completed simultaneously under one clamping, which not only ensures the verticality requirements of the inner hole and the end face, but also ensures that the size discreteness of large-scale gear blank production is small. This improves the accuracy of the gear blank and ensures the processing quality of subsequent gears. In addition, the high efficiency of CNC lathe processing has greatly reduced the number of equipment and has good economic efficiency.
4. Hobbing and gear shaping
The equipment used for processing the gear part still uses a large number of ordinary gear hobbing machines and gear shaping machines. Although they are easy to adjust and maintain, their production efficiency is low. If a large production capacity is to be completed, multiple machines need to be produced simultaneously. With the development of coating technology, it is very convenient to re-coat the hobbing cutter and the slotting cutter after grinding. The coated tool can significantly increase the service life, generally by more than 90%, effectively reducing the number of tool changes and grinding time, and the benefits are significant.


5. Gear shaving Radial gear shaving technology is widely used in mass production of automotive gears due to its high efficiency and easy realization of the requirements for the modification of the designed tooth shape and tooth direction.
6. Heat treatment
Carburizing and quenching are required for automotive gears to ensure their good mechanical properties. For products that are no longer ground after heat treatment, stable and reliable heat treatment equipment is essential.
7. Grinding
It is mainly to finish the inner hole, end face, outer diameter of the shaft and other parts of the heat-treated gear to improve dimensional accuracy and reduce geometric tolerances.

Delivery of ground gear ring and gear shaft of wind turbine

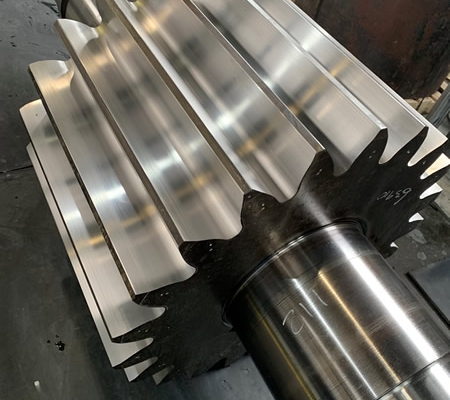
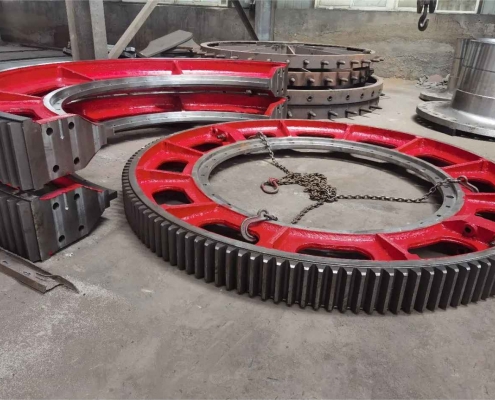
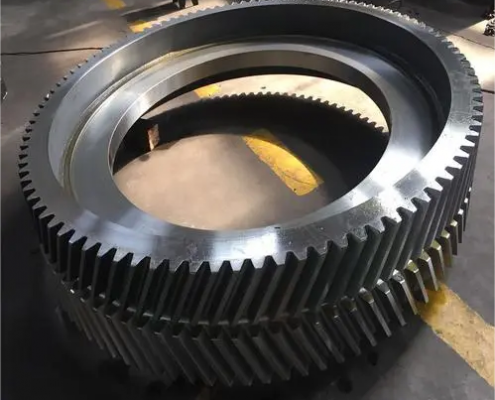
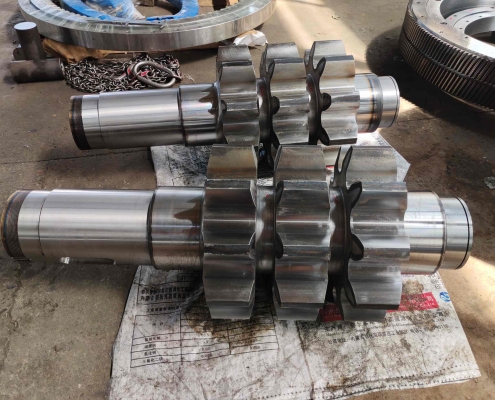
Recently, Luoyang Hengchang Heavy Machinery Co.,Ltd. cooperated with a company in the wind turbine industry to develop and manufacture a full set of main gear shaft and gear ring.

The R&D personnel adopted advanced design concepts to integrate the gearbox main shaft and main shaft bearing into the interior. Under the premise of ensuring the operating life of the equipment, the technical personnel repeatedly simulated and optimized the selection design, which greatly reduced the bearing supply cycle and purchase price.

From receiving the task to the drawing storage, from the designer’s 24-hour service production to the prototype, all data fully meet the user’s requirements and pass the whole process once. In order to shorten the manufacturing cycle, the company’s R&D, design, and assembly personnel work together, constantly explore, and overcome various processing and assembly difficulties one by one, shortening the original 5-6 months of manufacturing cycle to 3 months, and delivering high quality, high speed, and high standards to users.

If you are interested in our products, please contact us.

How to adjust the rotary kiln large gear ring during use?

Rotary kiln large gear ring processing manufacturers can produce various large gear rings according to drawings, and can ensure the product quality of large gear rings. So how should the large gear ring be adjusted during use?
1. The construction process of the rotary kiln large gear ring is as follows: divide the circle between the large gear ring and the cylinder into four equal parts, make a tool bracket for disassembly and adjustment, and fix the large gear.
Remove the bolts and locating pins at the connection of the two rings, and use a carbon arc air gouging to remove the spring sheet connecting the large gear ring to reduce the burn to the cylinder when removing the weld. After all the welds of the spring sheet are removed, use a crane to lift the two gear rings to the hard and flat ground on site, and then remove the connecting bolts between the spring sheet and the large gear ring. The connecting hole between the large gear ring and the spring sheet is re-drilled, and the bolt size is determined by the matching hole size. After the pinion and shaft are lifted and removed by the crane.


2. Correction of the rotary kiln large gear ring and spring plate. Lift the gear ring onto the prepared fixture bracket, and tighten the connecting bolts and positioning pins at the connection of the two gear rings of the large gear ring. Ensure that the joints of the two half teeth fit tightly, and use a 0.04mm feeler gauge to check around the mouth, with an insertion depth of no more than 100mm. Make two micrometer fixtures to detect the radial and end face swing of the large gear ring, divide 12 measuring points equally around the large gear ring, and use a rotary kiln to divide 12 measuring points equally around the large gear ring, record the test values, and adjust the radial and end face swing values ​​of the large gear ring through the bracket and adjustment fixture installed on the large gear ring. Now, the large gear ring has been running for several years. When adjusting, the radial and end face swing values ​​of the adjusted large gear ring should be controlled within 2.0mm and 2.5mm as much as possible under the premise of satisfying the normal operation of the large gear ring. Only after the radial and end face swing values ​​of the large gear ring are adjusted, can the connecting spring sheet be installed. The spring sheet and the barrel should be polished flat and tightly connected. The spot welding and welding of the spring sheet and the barrel should be carried out symmetrically to reduce deformation after welding.


3. Correction of pinion, reducer, main motor and auxiliary motor. The clearance between the top of the pinion and the large gear should be controlled at 0.25M+(2-3)mm, the tooth surface contact, tooth height and tooth length should not be less than 40% and 50%, and the coaxiality of the pinion shaft, reducer, main motor and auxiliary motor transmission shaft should be controlled at no more than 0.2mm.

A comprehensive review of the precautions in the design of gear shaft structure!

How to choose the positioning datum for the processing technology of gear shaft?
The processing order of the main surface of the gear shaft depends to a large extent on the selection of the positioning datum. The structural characteristics of shaft parts and the position accuracy requirements of the main surface of the spindle determine that the axis is used as the positioning datum, which not only ensures the uniformity of the datum, but also makes the positioning datum coincide with the design datum. Generally, the outer circle is used as the rough datum, and the sharp holes at both ends of the shaft are used as the fine datum. Pay attention to the following points when selecting.


(1) When the relative position accuracy requirements between the processed surfaces are high, try to complete the processing of each surface in one clamping.
(2) When the top holes at both ends (such as processing the spindle taper hole) cannot be used for rough processing or positioning, in order to improve the rigidity of the process system during workpiece processing, only the cylindrical surface can be used for positioning or the cylindrical surface and the center hole at one end can be used as the positioning datum. During the processing process, the outer circle of the shaft and the center hole at one end should be used alternately as the positioning datum to meet the mutual position accuracy requirements.
(3) If the shaft is a part with a through hole, the original top hole will disappear after drilling the through hole. In order to still use the top hole for positioning, a taper plug or taper sleeve mandrel with a top hole is generally used. When the taper of the shaft hole is large (such as the milling machine spindle), a taper sleeve mandrel can be used; when the taper of the spindle taper hole is small (such as the CA6140 machine tool spindle), a taper plug can be used. It should be noted that the taper sleeve mandrel and taper plug used should have high precision and minimize their installation time. The center hole on the taper plug and taper sleeve mandrel is both the positioning reference for its own manufacturing and the finishing reference for the spindle outer circle. Therefore, it is necessary to ensure that the taper surface on the taper plug or taper sleeve mandrel has a high coaxiality with the center hole. For small and medium-sized batch production, the workpiece is generally not replaced midway after the taper plug is installed. If it is necessary to repeatedly process the outer circle and taper hole based on the other party as a reference, when reinstalling the taper plug or bushing mandrel, align or re-grind the center hole according to the outer circle.


From the above analysis, it can be seen that the selection of positioning reference in the gear shaft processing technology should consider the following process arrangements: at the beginning, the end face center hole is drilled with the outer circle as the rough reference, and the positioning reference is prepared for rough turning; rough turning of the outer circle is the positioning reference for subsequent processing: in order to prepare the positioning reference for semi-finishing and finishing of the outer circle, the front and rear top holes are first processed as the positioning reference; the gear tooth processing also uses the top hole as the positioning reference, which well reflects the principle of unified reference and the principle of reference coincidence.

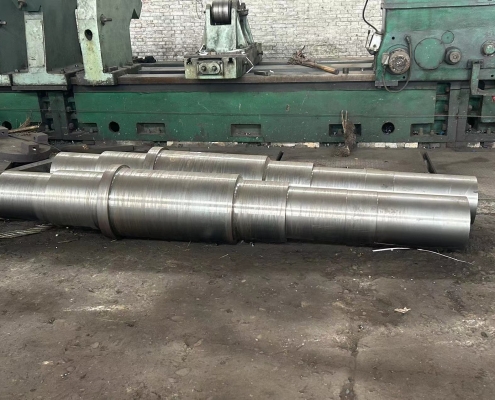
How to choose the material of the large spindle shaft?

Recently, many customers have asked how to choose the material suitable for the large spindle shaft, and how to choose the hard spindle material suitable for their products. Today, Hengchang Heavy machinery will introduce to you how to choose the material.

The hardness of the large spindle shaft is a relatively important parameter. Whether the hardness is appropriate is directly related to the quality of the product.


The hardness of the motor spindle will vary depending on the material, and the process selected during processing will also be different. At present, the common process treatments include the hardness of the raw material itself and the heat treatment process to harden. Some products have special structures, such as the need to punch ribs on the surface of the product, so the material of the motor spindle cannot be too hard, and some motor shafts have retaining rings, so the hardness range of the motor spindle is between HV500-600. It is more appropriate. If the material selected for the motor spindle is SUS420 series stainless steel, then the hardness range of HV260-320 is more appropriate. But remember that the hardness of the motor spindle cannot be too high. Sometimes the bearing capacity requirement is not very high, so it is enough to slightly temper the motor shaft. Some parts have special requirements, which can be quenched and chrome-plated.

Hengchang heavy machinery is a large-scale mechanical processing manufacturer, specializing in processing various large spindle shaft , gear shafts, spline shafts, gears, and racks. Welcome to consult!

What role does the big gear ring play in ball mill and rotary kiln equipment?

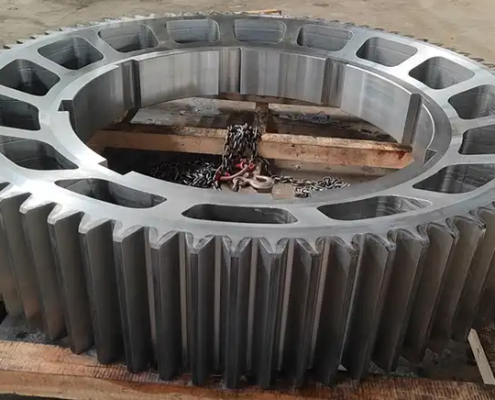
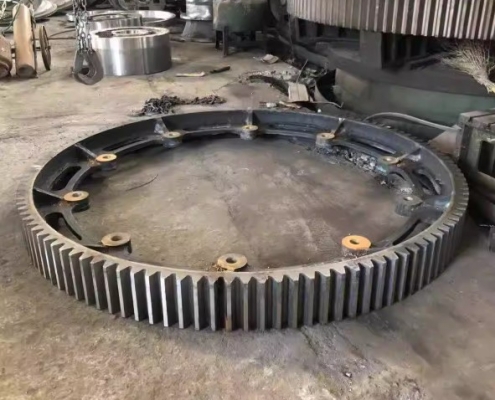
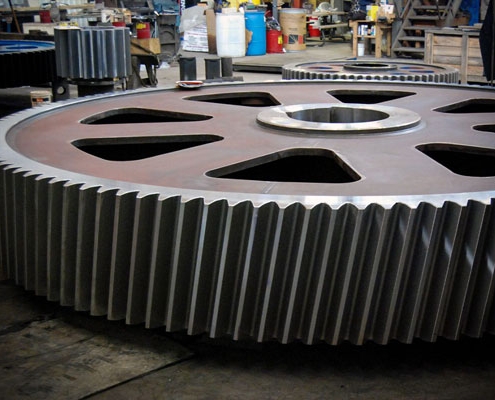
The big gear ring is one of the important transmission parts in mining machinery rotary kiln, ball mill, dryer and other equipment. Its quality is directly related to the continuous stability time and service time of rotary kiln, ball mill and other equipment, so the quality requirements for big gear ring products will be relatively high. Big gear rings are widely used in the machinery industry, for example, they have very important applications in electricity, chemical industry, automobile, etc.

Because the quality of the big gear ring directly affects the operation of the equipment, every detail must be accurately controlled during processing and production, and there must be no mistakes, otherwise the quality inspection will fail when the casting is completed. When producing big gear rings, ball mill parts manufacturers must require the quality of the big gear ring to pass layers of quality inspection, and only when the test requirements are met can it be shipped and used.

The large gear ring itself is composed of two half-size rings. The vertical mill parts manufacturer will be more complicated in the production process. For example, the blank is made from the process of making wooden molds, modeling, casting, and pitting, and then heat treated to improve the comprehensive performance of the large gear ring. After a round of rough processing, fine processing is carried out, and various inspections are carried out until a high-quality large gear ring can be cast.

Ball mill parts manufacturers have experience in producing tens of thousands of large castings, so they have become proficient in the production process of large gear rings. If you have a purchase demand for large gear rings, you can contact us and we will quote you free of charge!

6 major considerations for purchasing non-standard customized gears

Gears are an important part of mechanical transmission and there are many types of them. Among them, non-standard gear customization has gradually become the mainstream of the market. However, if we accidentally choose unqualified products during the purchase process, it will bring great troubles to our work and life. In order to help everyone avoid these problems, this article will introduce you to the 6 major considerations for purchasing non-standard gear customization.
1. Quality must be guaranteed
When purchasing non-standard customized gears, the first thing to consider is its quality. A high-quality gear should have the characteristics of high strength, wear resistance, and low noise. Therefore, before choosing, be sure to check the supplier’s production process and quality management system to ensure that its products meet relevant standards and requirements.
2. Ensure accurate size
Non-standard gear customization often needs to be designed and manufactured according to different usage requirements. Therefore, when purchasing, pay special attention to the dimensional accuracy of the gear. If the size is inaccurate, it will lead to assembly difficulties or poor transmission effect. Therefore, we should choose suppliers with advanced equipment and rich experience to ensure the dimensional accuracy of the product.


3. Understand the material characteristics
The material of the gear directly affects its service life and use effect. When choosing non-standard gears, we should understand the characteristics and applicable scenarios of different materials. Common materials include alloy steel, stainless steel, cast iron, etc. Each material has its advantages and disadvantages. We need to choose the right material according to actual needs.
4. Consider transmission efficiency
When purchasing non-standard customized gears, we also need to consider their transmission efficiency. The transmission efficiency depends on the tooth shape and number of teeth of the gear. When purchasing, we should ensure that the design of the gear can achieve high transmission efficiency to improve the overall working efficiency of the mechanical equipment.


5. Check the experience of process engineers
Non-standard gear customization requires experienced process engineers to complete. They can design and manufacture gears according to specific usage requirements and working environment. Therefore, before purchasing, we should understand the supplier’s process engineer team, understand their experience and strength, to ensure the quality and performance of the product.
6. Confirm after-sales service
We also need to carefully consider the supplier’s after-sales service. Gears are important components in mechanical equipment. If there are quality problems or other failures, after-sales service will play a vital role. When purchasing, we should choose suppliers who provide comprehensive after-sales service to obtain timely repairs and support.
Through the above 6 precautions, we can more accurately choose non-standard gear customized products that meet our needs. Be cautious when choosing suppliers and conduct multiple inspections to ensure that you purchase high-quality products and services. I hope this article is helpful to you. Thank you for reading!

Causes and solutions for broken teeth of ball mill pinion

1. Causes of fatigue fracture of ball mill pinion
(1)The main reasons for fatigue fracture of ball mill pinion are:
(2)The dynamic load of the transmission system is too large;
(3)The radius of the tooth root fillet is too small;
(4)The surface roughness value of the tooth root is too large;
(5)The tooth root is pulled during rolling;
(6)The material is defective, and heat treatment produces tiny cracks and other harmful residual stresses.
When the alternating stress at the root of the pinion of the ball mill exceeds the fatigue upper limit of the material, fatigue cracks will occur at the root fillet. The cracks will continue to expand after long-term operation, and eventually, the gear will bend and fatigue and break.


2. Overload fracture of ball mill pinion
The fracture of ball mill pinion due to overload is mainly due to the impact load of the ball mill being severely overloaded in a short period of time, which causes the gear to bear stress exceeding the upper limit stress.
When the load of the ball mill is severely concentrated, the dynamic load is too large, or a larger and harder foreign body enters the gear meshing, it will cause overload phenomenon and cause the pinion to break.
The fatigue fracture of the pinion of the ball mill is gradually caused by the long-term action of alternating stress. Since the pinion has a small number of teeth and a relatively large number of stress cycles, fatigue fracture is also possible.

However, the dynamic load of the ball mill transmission system is generally not very large. Moreover, before each replacement, the involute parameters, gear accuracy, and surface quality of the new gear are measured and inspected. The test results are in line with the technical requirements of the drawings. Judging from the time it took for the pinion of the modified wet ball mill to break after several replacements, it should be the combined effect of fatigue and overload.


3. Troubleshooting of broken pinion gears of ball mills

For the above-mentioned pinion gears of ball mills, corresponding adjustments can be made according to the technical requirements for the assembly of the main transmission gears of MQG wet ball mills:

1. Adjust the axial distance of the two gears according to the deviation range of the center distance of the gear pair to ensure the tooth top clearance and tooth side clearance between the two wheels. The tooth side clearance is measured by the lead pressing method;

2. Adjust the parallelism of the axes of the two gears so that the contact spot mark after the color inspection in the tooth width direction is centered;

3. Grind the tooth surface of the large gear damaged by broken teeth;

4. Change the splash lubrication of the tooth part to spray lubrication.