What does the tolerance of the slewing ring mean?

There are many technical indicators that reflect the accuracy of slewing bearings and slewing bearings, such as axial clearance and radial clearance, end jump and radial jump, parallel difference and inside and outside difference, roughness, dimensional tolerance, position tolerance, etc. So, do you know what the tolerance of slewing ring refers to?

The dimensional accuracy and rotation accuracy of the slewing bearing are based on ISO and JIS standards. For machinery that requires high precision and high-speed operation, it is recommended to use bearings with accuracy grade 5 or above. Deep groove ball bearings, radial thrust ball bearings or cylindrical roller slewing bearings are suitable for machinery with high operating accuracy.

Slewing ring

The inner diameter and outer diameter of the rolling slewing ring are manufactured according to standard tolerances. The tightness of the slewing ring inner ring and shaft, outer ring and seat hole can only be achieved by controlling the tolerance of the journal and the tolerance of the seat hole. Tolerance includes shape tolerance and position tolerance.

When the dimensional tolerance accuracy is determined, the shape tolerance has an appropriate value, that is, generally about 50% of the dimensional tolerance value is used as the shape tolerance value; about 20% of the dimensional tolerance value in the instrument industry is used as the shape tolerance value; heavy industry Approximately 70% of the dimensional tolerance value is used as the shape tolerance value. This shows that. The higher the dimensional tolerance accuracy, the smaller the proportion of the shape tolerance to the dimensional tolerance. Therefore, when designing the size and shape tolerance requirements, except for special circumstances, when the dimensional accuracy is determined, the 50% dimensional tolerance value is generally used as the shape tolerance value , Which is not only good for manufacturing but also good for ensuring quality.

There is also a certain relationship between shape tolerance and position tolerance. From the perspective of the cause of the error, the shape error is caused by machine tool vibration, tool vibration, spindle runout, etc.; while the position error is caused by the non-parallelism of the machine tool rails, the non-parallel or non-perpendicular tool clamping, and the effect of clamping force. As a result, from the definition of tolerance zone, the position error includes the shape error of the measured surface. For example, the parallelism error contains the flatness error, so the position error is much larger than the shape error. Therefore, under normal circumstances, when there is no further requirement, the position tolerance is given, and the shape tolerance is no longer given. When there are special requirements, the shape and position tolerance requirements can be marked at the same time, but the marked shape tolerance value should be less than the marked position tolerance value, otherwise, the parts cannot be manufactured according to the design requirements during production.

Slewing bearing

The slewing bearing and slewing ring have high precision, which represents the level of precision and processing technology, which means higher value. They are generally used for precision machine tools, precision equipment and high-precision instruments to achieve measurement and control, positioning and pointing. The runout is controlled at 0.02, ~ 0.05, the clearance value is controlled at 0.01-0.06, the roughness is controlled at Ra1.6/0.8, the hardness is uniformly distributed, the parallel difference is controlled at 0.015, and the dimensional tolerance must be in accordance with the requirements of the drawing.

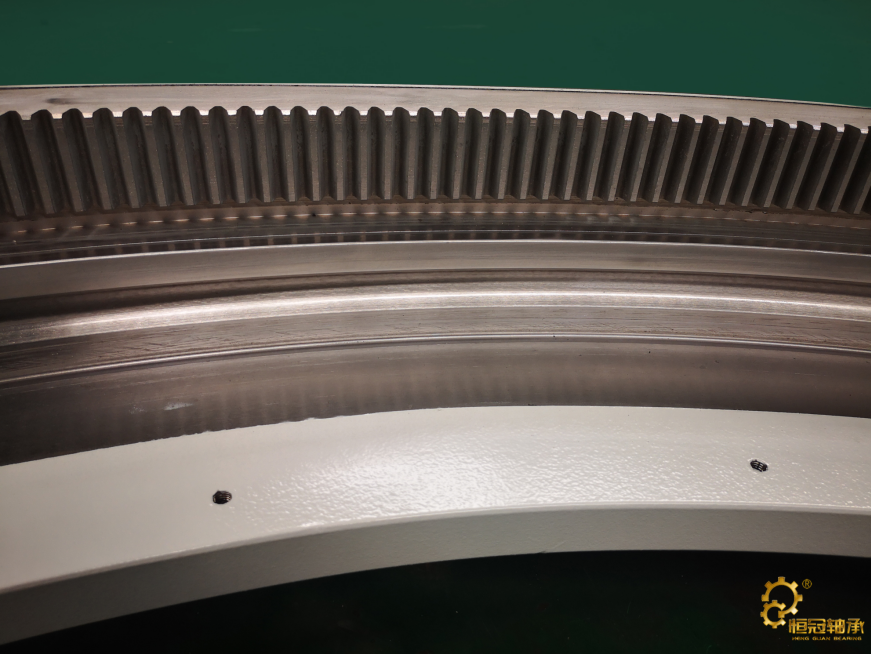
High-precision slewing bearing for automatic welding equipment was successfully completed

Recently, our company has produced a set of non-standard customized special-shaped high-precision slewing bearings for a high-tech enterprise in Beijing. This set of bearings is used on high-end automatic welding equipment for processing nuclear equipment. This is the second time this company has been with us. The first cooperation was for large-scale precision slewing bearings. In view of our previous happy cooperation, the customer chose to cooperate with our company for the second time without hesitation. The customer’s cooperation again is for the quality of our products, technology, and pre-sales. , Sales and after-sales service are confirmed again.

This product has several important features:


  1. The outer diameter is large, reaching 2.2 meters, which is much higher than the size range of high-precision slewing bearings commonly made in the market.


  1. the precision requirements are extremely high, the end jump and the diameter jump are strict, the end jump is within 0.05mm, the diameter jump is less than 0.1mm, and the clearance is 0-0.005mm.


  1. The starting torque is very small, requiring one person to rotate easily.


  1. the surface should be hot-sprayed zinc, and it is required to reach the level of wind power bearing.

Our company strictly follows the requirements of the customer to confirm the drawings, formulates the processing and production plan, anticipates the problems that may occur in each process, and thinks up targeted solutions in advance to ensure that each process is within the controllable range, so as to ensure the quality and safety of the assembled product . After a series of controllable processing procedures and the timeliness of the materials in the processing, the technical requirements of the finished product have reached the requirements specified in the drawings confirmed by the customer. Moreover, the rotation is flexible, which can be easily rotated by one person.

Talking about the gear grinding technology of slewing bearing

As a process to be realized by precision products, the situation of grinding teeth needs to be noted, and what kind of technical indicators should be achieved. This article analyzes one by one. Regarding the slewing bearing or slewing bearing, whether external or internal teeth, helical teeth, etc., the normal process level, there are gear shaping, gear hobbing, and milling gears, according to the design standard, the general standard of gear accuracy is 9 teeth or 10 teeth. Here 9-level teeth or 10-level teeth, the index to be investigated is based on the design standard of the slewing bearing of JB/T10471, and you can also refer to JB/T2300.

mainly reflects the rotation accuracy, the specific indicators are:

1, the number of teeth across and the length of the common normal;

2, common normal deviation

3. Tooth jump (tooth jump of the finished slewing bearing);

4. Tooth width, tooth thickness, tooth profile and tooth direction are generally not marked separately in the drawings.

In short, the value of the 9th grade or 10th grade of the slewing bearing is the same in a pure sense. In terms of design concepts, the common normals of grade 7 and grade 8 teeth, and the tooth jump also meets the design requirements. However, tooth surface quenching has a great impact on the accuracy of the tooth surface, generally one step backward.

Slewing bearing

The following effects can be achieved by grinding teeth:

1. Improve meshing accuracy;

2, tooth jump 0.06-0.15mm;

3, tooth surface roughness Ra0.8;

4. Reduce meshing noise;

5. Reduce the wear strength of the tooth surface.

Gear grinding, improve the roughness of the gear, and then improve the accuracy of the gear, including the common normal of the gear, the tooth jump, the smoothness has a qualitative leap, and the meshing accuracy is also greatly improved.